Kayleigh shares articles on Society blog. She also blogs about her experiences in the workforce and how she set out to find a career she loved, which led her to work with an ethical employer. maemae believes that life is too short not to enjoy your job, and that there's no shame in pursuing a career you love!

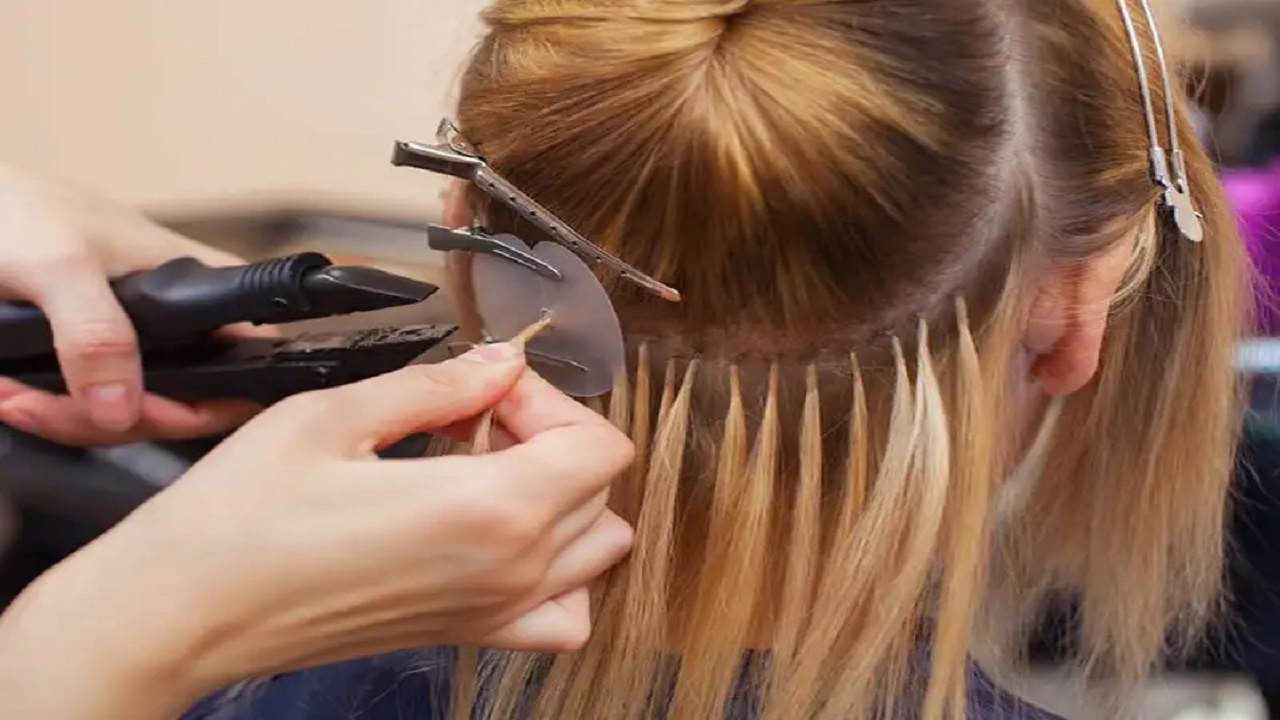
Among the most popular hair extensions for people who want longer, thicker hair without using heat or adhesive are I-Tip or micro link extensions. These extensions are fixed with tiny beads which are fitted on the natural hair by clamping. In this article, you will learn how to install i-tip hair extensions through a simple step-by-step guide.
Materials Needed
It’s crucial to get ready all the items needed for the installation procedure first. I-Tip hair extensions, a bead loop tool, microbeads, hair pliers, sectioning clips, a comb, and a brush are needed for installation. By arranging the materials required on time, you can ensure the smooth process of attaching hair extensions.
Step 1: Preparing for the Process
Upon cleaning and drying the hair, confirm that it is free of any oil or dirt. It’s also essential to wash the hair to get rid of any oils and other elements so that the weave holds nicely. Using sectioning clips, split your hair into pieces after washing it to get rid of tangles. Working your way up from the nape of the neck is usually the best course of action.
Step 2: Launching the Bead Loop Tool
Pick up the microbeads using the bead loop tool. The number of beads to be loaded will depend on the extensions that you wish to install. You should have adequate beads to cover each extension.
Step 3: Insert Natural Hair into the Bead
Using the bead loop tool, slide a small section of your natural hair (the width of a drinking straw) through the loop. Place the loop tool at the desired position and push it downwards so that the microbead moves to the required part of your hair. Place the bead slightly off the scalp but do not touch it to be comfortable for the wearer.
Step 4: How to Attach the I-Tip Extension
Now, take an I-Tip extension and place the tip of it into the microbead along with the piece of natural hair. Make sure that the extension is inserted straight and tightly in the bead.
Step 5: Securing Hair Extension
Using the hair pliers pinch the microbead firmly to hold both the natural hair and the I-Tip extension. Make sure that the bead is pressed flat enough so that the extension does not move with time.
Step 6: Repeating the Process
This process should be continued row by row up the head. It is also important to space the extensions out enough so that it looks more natural and not too much pressure is put on the natural hair.
Step 7: Blending the Extensions
After all the extensions have been installed, cut and set your hair as you wish so that the extensions can blend with the natural hair. It is advisable to use a flat iron or curling wand to blend the extensions with your hair texture.
Conclusion
The procedure of installing I-Tip hair extensions is relatively simple if the right tools are used and the hair is well prepared. Here are the procedures that you should follow to get a natural and voluminous look to boost your looks and confidence. Please remember that aftercare is crucial to maintaining the look and longevity of the extensions.
